Most drivers never think about it until someone points it out: the tiny plastic nub fixed to the belt just below the metal latch. It doesn’t flash or beep, and it won’t change the feel of your ride. Yet that small stop is quietly doing work every time you reach across your shoulder and click in. What looks like an afterthought is actually a smart restraint feature built to save you time, keep the hardware in place, and help the belt sit where engineers intended.
Here’s the thing: modern seat belts are carefully tuned systems. Webbing angle, latch position, buckle height, and retractor force all add up to consistent performance in a crash. If the latch plate slides too far down the belt, every buckle-up starts with a hunt near the floor, and alignment can drift. That little button prevents both hassles. It parks the latch where your hand expects it and helps the belt lie flat, so the geometry stays predictable when it matters.
What the little button actually does
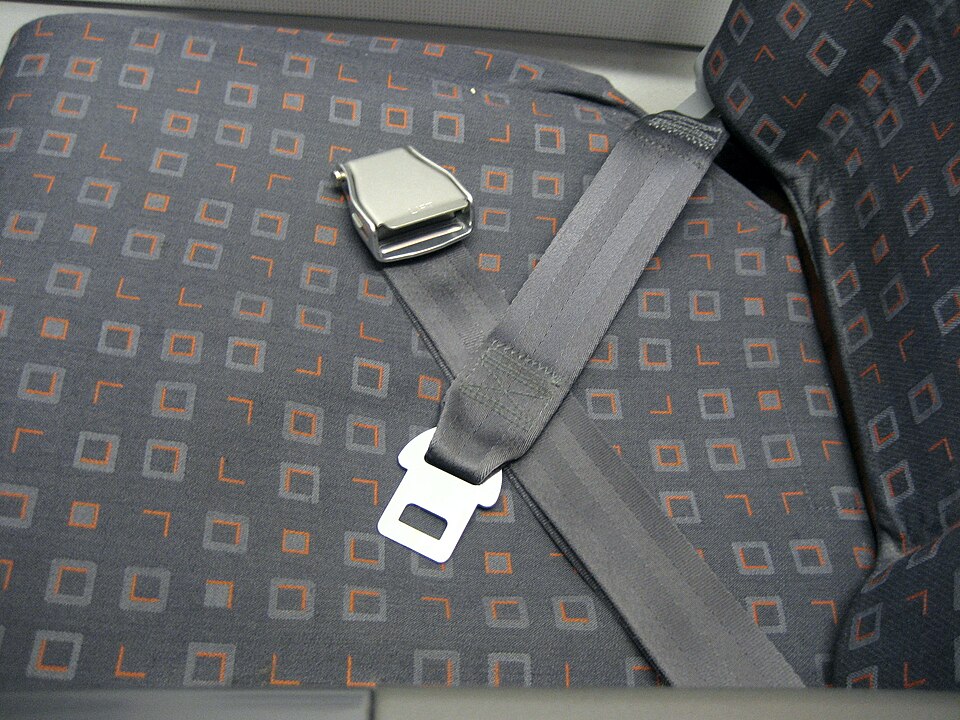
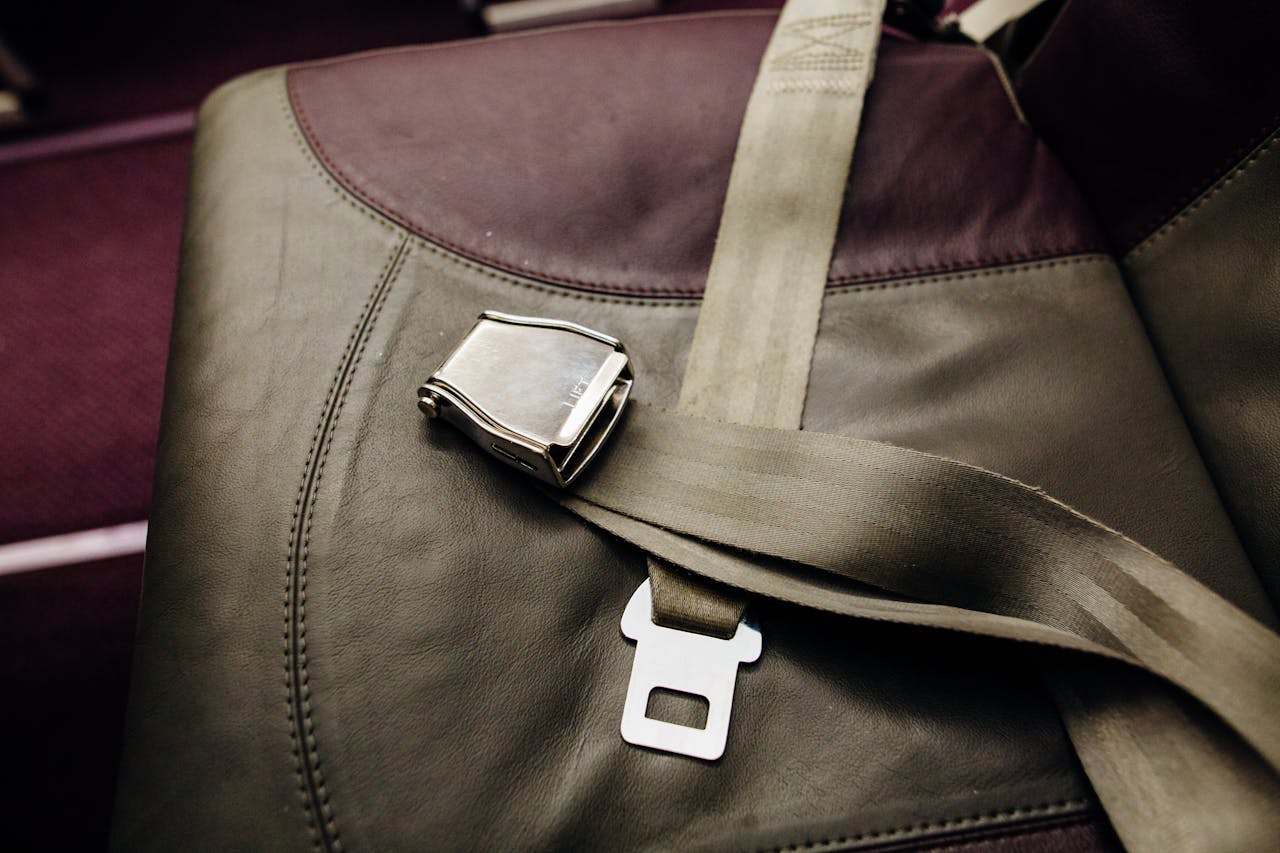
The button is a stopper. It’s pressed through the webbing to keep the latch plate from sliding down toward the retractor, which is why your hand finds the metal piece right where you left it. No digging under the seat. No twisty belt gymnastics before school drop-off or the morning commute.
It also nudges you toward a proper fit. When the latch plate lives in the same zone on every trip, the belt tracks cleanly across shoulder and lap. That predictability makes it easier to buckle without twists and helps the restraint maintain the angles engineers target for real-world protection.
Why latch position and alignment matter
Belt geometry isn’t cosmetic. A shoulder strap that rides too close to the neck or drifts off the shoulder can chafe, distract, or tempt someone to route it under the arm. The stopper anchors the starting point so the webbing lays flat across the collarbone and sternum, then tightens as the retractor locks in a stop. Shorter paragraph.
There’s a convenience win too. Without the button, the latch plate can migrate and end up by the door or the floor tunnel. You’d spend a few seconds fishing for it at every start, which adds up over school runs and grocery dashes. The stopper turns that search into a single, repeatable motion. Shorter paragraph.
Consistent latch location also reduces twists. Twisted webbing weakens performance and feels awful across the chest. Keeping the plate parked where it belongs makes accidental twists less likely and easier to spot before you click in.
In a crash, belt load spreads across the strongest parts of the torso. Starting from a clean, aligned path keeps that load where designers intend. The button isn’t a crash component by itself, but it supports the system by curbing the drifting habits that lead to poor routing.
Where to find it and what to look for
You’ll spot the stopper just below the latch plate on most belts. Some setups add a second button above the plate, creating a channel that keeps the metal piece centered on the webbing. The parts are small, smooth to the touch, and meant to disappear into muscle memory.
If the belt looks cluttered with loops, guides, and height adjusters, don’t overthink it. The stopper sits on the webbing itself, not the B-pillar height slider or the buckle stalk. Run your fingers down from the latch plate and you’ll feel the bump in seconds.
Why some cars have two buttons, one, or none
Seat belt systems aren’t identical across every seat and model. Designers choose stoppers, guides, or buckle geometries to solve the same problem: keep the latch accessible and the belt aligned. Some front seats use two buttons to corral the latch, while a rear center belt may rely on a molded guide near the roof or seatback. Shorter paragraph.
You might notice the driver belt sometimes lacks the fabric loop you see on passenger belts. That loop is different from the stopper and is often omitted on the driver side to reduce entanglement risk with steering and seat adjustments. The stopper, though, can appear on any position depending on the restraint layout. Shorter paragraph.
A few vehicles skip stoppers entirely. That doesn’t mean the design is worse; it means the belt geometry, buckle angle, or a guide ring solves latch drift without a button. The goal is the same: predictable starting point, clean routing, quick buckle.
If you share cars or rotate through rentals, these variations will stand out. Don’t chase uniformity. Just check where the latch rests, verify the belt lies flat over shoulder and hip, and adjust the pillar height so the strap kisses the middle of the collarbone, not the neck.
If the button pops off
Buttons can loosen with age, repeated tugs, or a hard snag. If yours breaks or disappears, you don’t need a new seat belt on that fact alone. Replacement stopper kits exist, and the install is straightforward: align, press through the webbing with the backing half, and clamp per instructions.
Treat it like a convenience fix with a fit bonus, not a race-shop upgrade. The real inspection priority is the webbing and hardware. If the belt is frayed, glossy from heat, cut, or contaminated with oil or chemicals, stop and get a professional assessment before you worry about a missing nub.
When a missing stopper becomes a bigger issue

Driving without the button won’t suddenly make the belt fail, but it can make you lazy about routing. A drifting latch invites twists and awkward shoulder placement, which can compromise comfort and lead to bad habits. That’s why replacing the button is worth the few minutes it takes.
If you see any webbing damage, sticky retractors, jammed buckles, or airbags and pretensioners deployed in a crash, that’s a different story. Those conditions call for manufacturer guidance or a qualified repair, because restraint performance depends on more than one plastic part.
Simple checks that keep belts doing their job
Give the belts a monthly once-over. Pull them fully out and look for frays, cuts, stitching damage, or spots that feel thin or slick. Let them retract and tug sharply; you should feel a clean lock from the inertia reel. If one belt retracts sluggishly, vacuum the slot and check for trim interference before assuming hardware failure.
Keep the routing honest. The shoulder strap belongs over the collarbone, not tucked under an arm or behind the back. The lap belt should ride low over the hip bones, not the belly. If your vehicle has a height adjuster on the pillar, set it so the strap meets the midpoint of your shoulder and clears the side of your neck.
A quick note for families: boosters exist to fix geometry, not just to satisfy a law. If the shoulder strap still cuts across the face or neck without a booster, the child isn’t ready for the vehicle belt alone. The humble stopper won’t solve that; proper seating will.
Sources
If you want to dig deeper into restraint design, start with safety agencies that publish plain-language guidance and technical summaries. Their pages explain how belts, pretensioners, and airbags share the workload, and they include maintenance and post-crash replacement advice backed by testing.
Useful primers and policy notes live with organizations that set standards or investigate transportation safety. See NHTSA, the National Transportation Safety Board, IIHS, SAE International, and your vehicle maker’s online owner resources, such as Toyota or Ford.